A Brief Visual History of Astronomy
Author(s): Deb Spatafore
Subject: Earth Science
Grade Level(s): Grade 5
Big Idea(s): 1. In Western culture, throughout history, astronomers, philosophers, and mathematicians have provided us with a picture of what the universe looks like. Students will look at some of the major steps in the history of astronomy, and the visual images that accompanied them.
2. The solar system is made up of a 8 planets that are of varying sizes and colors, and have separate orbits around the sun
What you need: * 12′ x 18″ black pieces of paper
* White and Yellow tempera paint
* Paint Brushes
* Rulers
* Newspaper (optional)
* Planet Template
* Reference Handout
* Watercolor paints and brushes
* Cups of Water
* Rags
Setting: both inside and outside
Time Needed: 2-3 days possibly more
Summary:
Children will create a piece of art depicting the solar system. The art piece is done in three stages.
Learning Goals / Objectives:
1. In Western culture, throughout history, astronomers, philosophers, and mathematicians have provided us with a picture of what the universe looks like. Students will look at some of the major steps in the history of astronomy, and the visual images that accompanied them.
2. The solar system is made up of a 8 planets that are of varying sizes and colors, and have separate orbits around the sun
Background
Setup:
Place a bowl of white paint and 2 paint brushes or a paint brush and a ruler, outside, in the area where the sky paintings will be made.(Preparation: Tempera paint will quickly wear away from a blacktop or grass area, so nothing has to protect the ground, but if you feel the need, lay newspaper on the ground.)
Anticipatory Set:
OBSERVE AND DISCUSS MASTER ARTWORKS and EXAMPLES:
Read the information titled “A Brief History of Astronomy.” Show students the 6 images and discuss the different theories and ways that the universe was explained visually. After the information is provided discuss the following:
* Why do you think Galileo’s sketches were so important? (Galileo was actually looking at the moon, when he made his sketches. Previous pictures of the universe were only imaginary models based on intellectual/ religious ideas.)
* How do you think the NASA photographs are adding to our understanding of the universe?
* Do you think artists will continue to make art based on astronomy? Why?
Instructions / Activities:
Step 1: Create the Sky
Take students outside to a prepared area where the sky paintings will be made. Demonstrate for students how the sky paintings will be created.
1. In the classroom write your name on the back of one of the 12″ x 18″ black pieces of paper.
2. With name side down, place the paper in the prepared area.
3. Dip the brush into the white paint
4. Hold the ruler or other paint brush rigidly in your non-dominant hand and lightly whack the brush with the paint against it, aiming the paint toward your black paper. It will make a splatter of white paint.
5. Continue this process, moving around your black paper, until the illusion of a starry night is achieved. This should take less than a minute
6. Place the tools where you found them, and return to the classroom with your sky painting, putting it in a safe place to dry.
Note: students can be excused to make their sky paintings, while completing the research and tracing activity below.
Step 2: Research the planets and trace them onto watercolor paper.
1. Provide each student with a copy of the planet templates and reference handout (see attached). Have them read through the material. As they determine the size of each planet, have them label the template with the planet’S name. Have them underline information in the reference material having to do with the planet’s placement in the universe, and hints about the planet’s color.
2. Direct students to trace each circle onto the watercolor paper using the following method for each circle:
• Turn the planet template over. On the back side, color over the outline of each planet, using the side of your pencil.
• Trace the circles onto the watercolor paper.
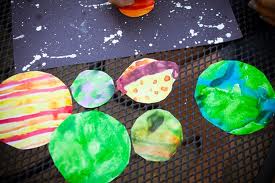
Step 3: Paint the planets using a wet-into-wet watercolor technique.
1. Provide students with watercolor sets, brushes, cups of water and rags. Demonstrate the wet-into-wet technique as follows:
• Dip the brush into water and wet the paint pan thoroughly to begin. Explain: “You should have a little pool of water in the colors you plan to use.”
• Dip the brush into water again, and paint one of the circles with water. Explain: “You should have plenty of water inside the circle.”
• Wet the brush again, and dip it into one of the colors in the paint pan, gently drop or stroke the pigment into the watery circle you created in the previous step.
• Repeat with a contrasting color.
• Remind students: {(Use your brush carefully and softly. If you paint the colors too much they will blend together. Water makes the watercolor move, so make sure you have plenty of water in the circle before you begin to paint it.”
2. Have students paint the planets using the color notes they wrote down during the research phase of this lesson.
Step 4: Create the solar system artwork.
3. Provide students with yellow tempera paint, brushes, and rags. On the left edge of their sky painting, made earlier, have them paint a slight curved line from the top corner to the bottom corner. Fill in the curve with yellow paint to represent the sun.
4. Direct students to cut out the watercolor planets, and place them in the correct order from the sun. Explain that even though the planets have to be in the correct order, they don’t have to be in a straight line, and students should create a pleasing composition.
5. Direct students to glue the planets to the sky painting, and sign the back if they have not already done so.
Assessment:
Teacher’s discretion.
Wrap-up / Closure:
Discuss with students: “The drawings of early ideas of the universe showed people those ideas in visual form. What do your paintings tell you about the universe?” (relative size of the planets, order from the sun, colors)
Attachments:

Tags: Grade 5
Categories: Earth Science